

Default Configurations
CUSTOMIZE THE USER EXPERIENCE
D&B Hoovers administrators can customize the experience for new users by configuring site-wide defaults for notifications, Ideal Profile, user preferences, desktop pins, lists, and more.
The options available to you on this screen depend on your subscription level. Please read below for an overview of common options. Access these options by selecting Default Configurations from the gear icon at the top right.
Suppress Connections
- Disables all D&B Hoovers connectors for users on this site. Switching the toggle to On will disable all active connections.
- If the connections are disabled, they cannot be turned on by individual users.
- To turn this feature off, click the toggle to Off and you can re-establish your connections.
Suppress Page Help
- Disables the automatic
- appearance of Page Help tooltips throughout the application. Switching the toggle to On will disable the tooltips.
- If the tips are disabled, they cannot be turned on by individual users.
- To turn this feature off, click the toggle to Off and the tooltips will no longer be suppressed.
Suppress What’s New
- Disables the automatic appearance of What’s New messages throughout the application. Switching the toggle to On will disable these messages.
- If these messages are disabled, they cannot be turned on by individual users.
- To turn this feature off, click the toggle to Off and the What’s New messages will no longer be suppressed.
Ideal Profile®
Available with select subscriptions.
- Ideal Profile gives users the ability to define criteria that represents their ideal customer profile. Once you create your Ideal Profile, D&B Hoovers scores that criteria against every company in our database to show you on a scale of 0-100 how closely that company aligns with your target.
- Each individual user can set their own Ideal Profile, but Administrators can streamline onboarding by setting a default Ideal Profile configuration for new users. This configuration will also be applied to any existing users who have not set their Ideal Profile. An individual user can override the default configuration by going to User Preferences on the User Menu, clicking the Ideal Profile tab and adjusting the criteria.
- Complete the following steps to set the default Ideal Profile for your users.
- Navigate to the Ideal Profile section of the Default Configurations screen.
- Click Edit Business Signals at the right.
- Select the Business Signals that are relevant to your need and then click Save.
- Drag the blue circle for each Business Signal to assign a level of importance to that Signal. The farther you move the circle to the right, the higher the importance of this characteristic to your profile.
- Click Save Ideal Profile when done.
- You can return to this screen at any time to modify the Ideal Profile.
Hoovers Labs
- Enables D&B beta features under the Hoovers Labs menu for all users on this site. When toggled to Off, users will not have access to selected D&B beta features, including AI-powered tools.
- To turn a feature on, click the toggle to On and the Hoovers Labs-related feature will no longer be suppressed.
User Preferences
- Administrators can pre-configure default user preferences for new users and existing users who are still using the default configuration.
- Help personalize the experience for your users by designating the default currency, distance units, and industry classification system you want to work with.
- Use this option to set up notification and trigger preferences so that your users receive email and/or in-product notifications of trigger alerts and additions to SmartLists.
- Users can override the default configuration by editing this information on their User Preferences page, which is located in the user menu.
| The User Preferences options pictured below are available for pre-configuration: 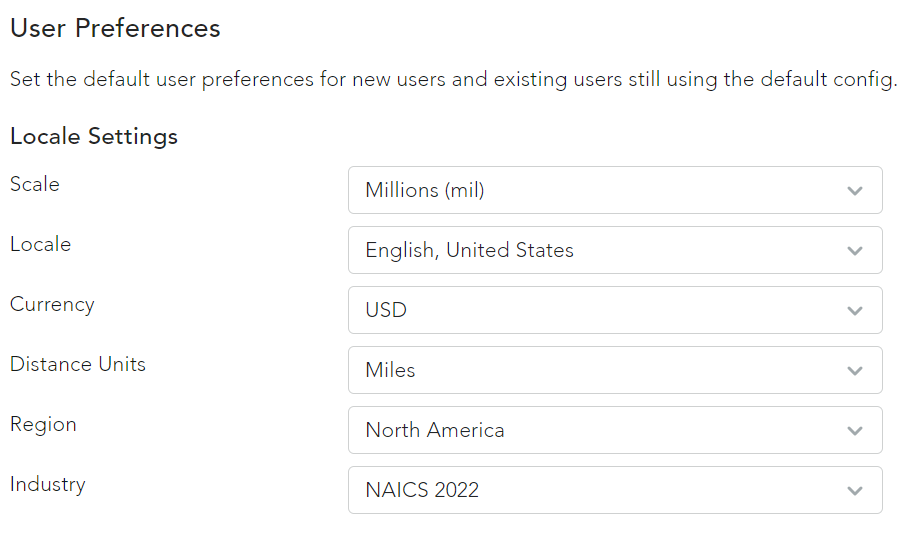
|
Default Desktop Pins
- Administrators can help your new users focus on key information by creating default desktop items for your account.
- Follow these steps to create default pins:
- Open the desired company profile, industry profile, etc.
- In the Actions menu (three dots) at the top right, select Pin for New Users from the drop-down. This will make the item a default desktop tile for new users.
- As you create pins, the items will display in the Default Desktop Pin section of the New User Defaults screen.
- You can remove items by clicking the item name, navigating to the Actions menu (three dots) at the top right, and selecting UnPin for New Users from the drop-down.
- Lists can be also pinned via the Lists section in Defaults Configurations.
- Note: Default tiles will only appear for newly-created users and will not appear for existing users.
Lists
- Admins can use this option to quickly share lists with all users on the account.
- All of the lists created by your username are displayed in this area. Click Share with all site users to share the list so it will appear in the Lists menu with all users on your site.
- Once a list is shared with all users, you have the option to make it a pinned item on users’ desktops. To do so, click the pin icon in the Default Pinned column. If you change your mind, click the icon again to unpin the list.
- After a list is shared, you can click Un-share to stop sharing with all site users.