

Working With Lists
SAVING LISTS, EXPORTING DATA & MORE
In this section we will cover:
- How to save search results as a list or SmartList®
- What is a SmartList?
- How to download lists and search results as an Excel or CSV format
- How to export data to a CRM or marketing automation platform
- How to upload a list of companies to D&B Hoovers
- Tips & Tricks for lists and exports
- How to access lists on the Lists Page
Saving Lists
D&B Hoovers Provides Two List Options
- List: When you save your search results as a list, D&B Hoovers captures the data at that moment in time and the items that are included will not change.
- SmartList: A SmartList will dynamically update as new companies or contacts within the Dun & Bradstreet Data Cloud fall within your list criteria.
How to Save a List or SmartList
- Determine if you want to save the results as a new list, add to an existing static list, or create a SmartList with the search criteria used to generate these results.
- You can individually select items to save as a new list or add to an existing list. Click the checkbox at the top left of a company to select items. (Please note: You can only select items from one page of search results before saving to a list.)
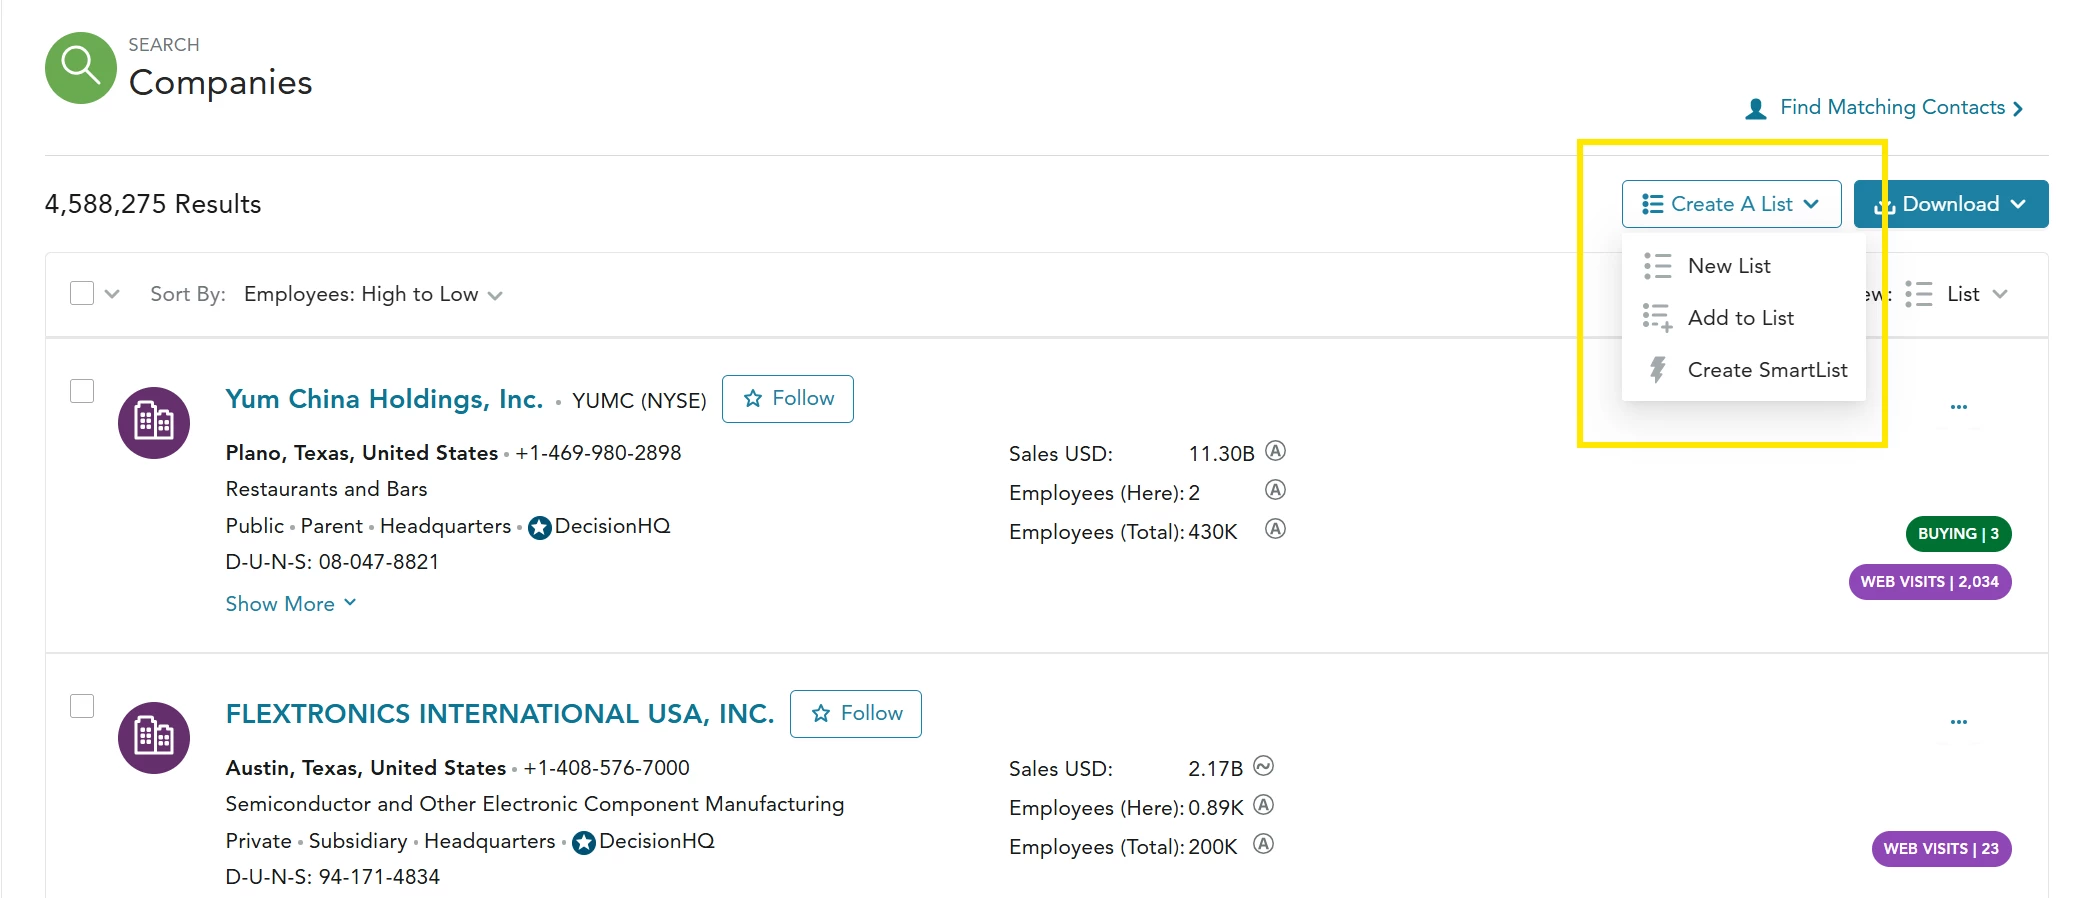
- Click the Create A List button on the search results screen.
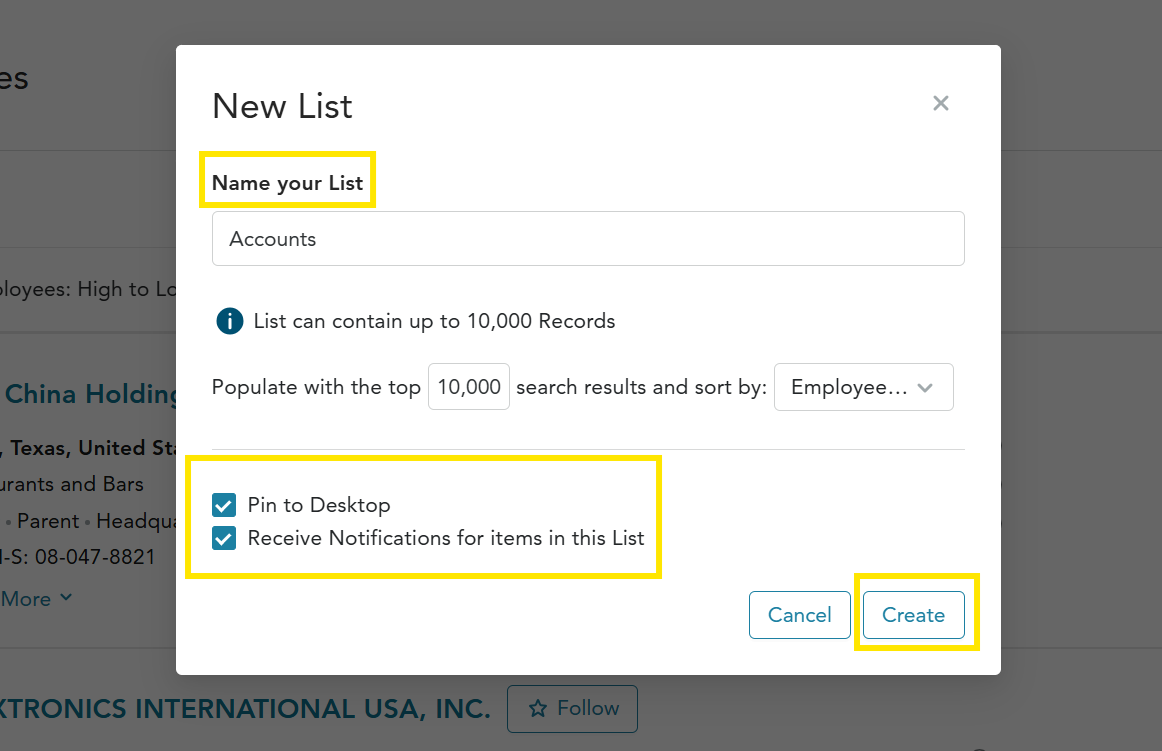
- New List: Follow the prompts onscreen to name and save your list. The items in your search results will be added to the list.
- Add To List: Select the existing list where you want to save the items in your search results.
- Create SmartList: Follow the prompts onscreen to name and create your SmartList. The search criteria used to create your search results will be saved with the SmartList.
- Check Pin to Desktop if you want to access the list or SmartList on your D&B Hoovers Desktop.
- Check Receive Notifications for Items in this List or Receive Notifications for Items in this SmartList to enable in-product notifications for this list. You will also receive email notifications if you have enabled email notifications on the User Preferences screen.
- Click Create or Add to save your configurations.
SmartLists can help you:
- Get in the door faster
- Monitor your territory
- Feed pipelines with actionable opportunities
| What is a SmartList? SmartLists dynamically update when D&B Hoovers finds new companies or contacts that meet your list criteria. Run your search criteria, save the results as a SmartList and D&B Hoovers will keep monitoring our global data cloud 24/7 to identify new companies or contacts that fall within your list criteria. When this happens, the new items will automatically be added to your list and items that no longer meet your criteria will be removed. With a SmartList, you will always have the most current and relevant list of opportunities. |
Tips & Tricks for Working with Lists
Rename a Saved List or SmartList
Open a list or SmartList. Click the pencil icon next to the list name to rename your list or SmartList.
Modify SmartList Criteria
Open a SmartList, then look under the SmartList name and click the Show Criteria link. At the end of the criteria you will find a Modify tool, which can be clicked to return to the Search & Build A List form where you can add or remove criteria. Click View Results to see how the modifications have changed your results, and then click Save at the top left to modify the criteria for the SmartList.
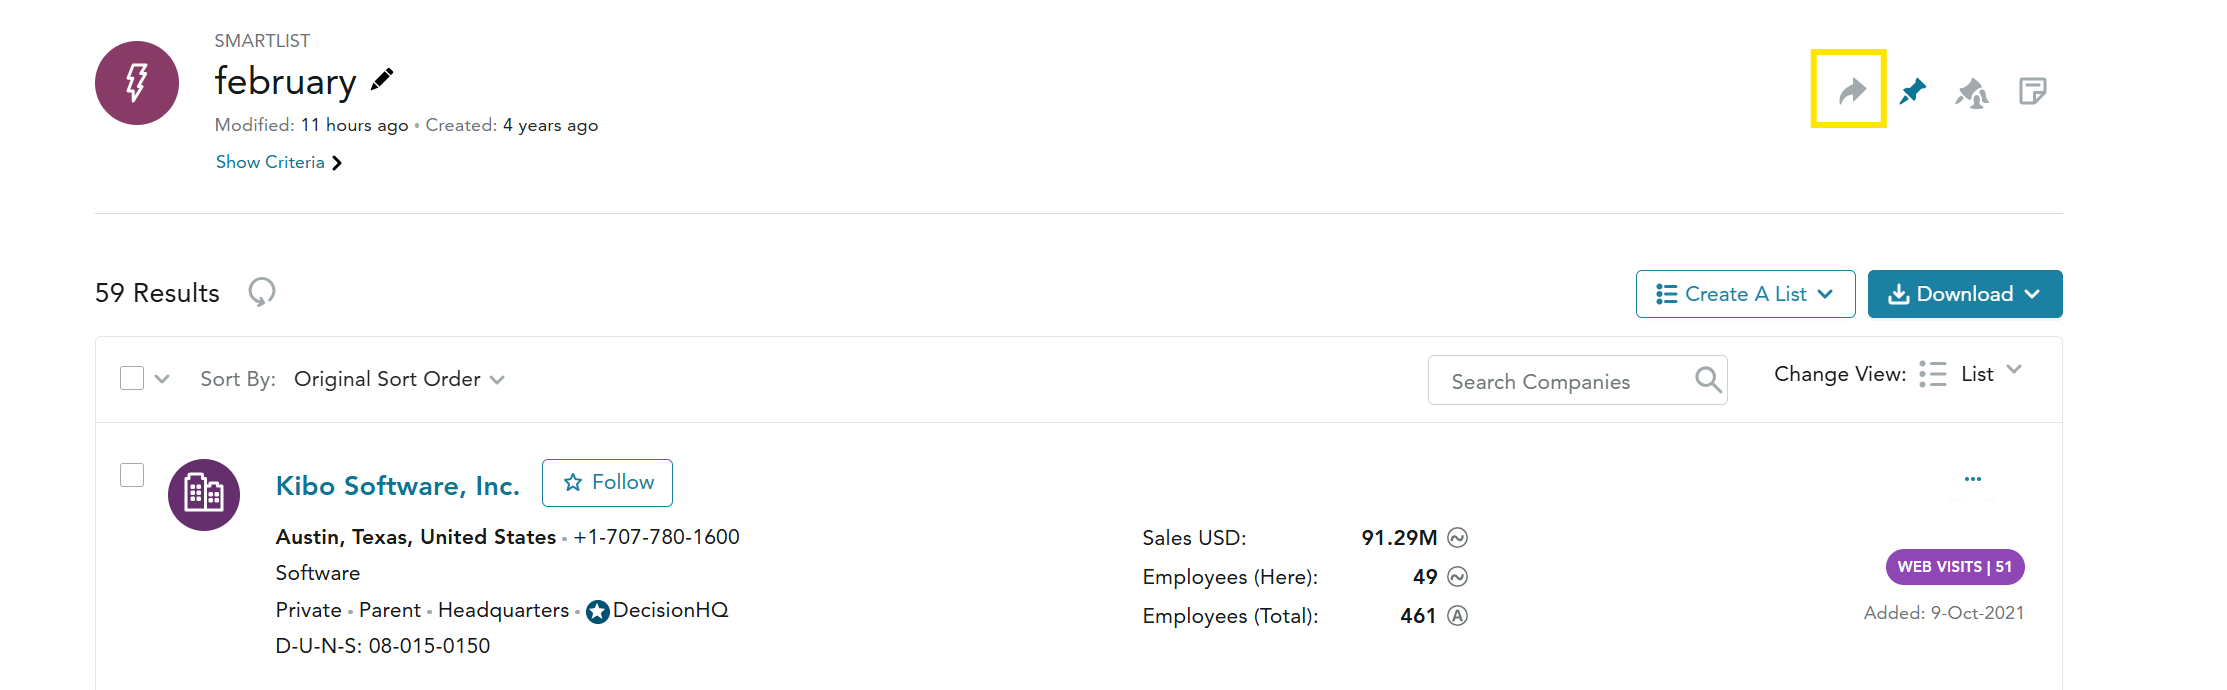
Share a List
Easily share a list with another D&B Hoovers user or a Group defined by your Admin by clicking the share icon next to a list or SmartList name. As you modify your list or SmartList in the future, those changes will be automatically applied to the shared list as well. The recipient of your shared list can save that list or SmartList into their own account to make their own modifications.
To learn more about sharing, see the section on Sharing Content.
How to Download or Export Search Results and Lists
D&B Hoovers provides multiple options to export search results or lists, including:
- Download as an Excel or CSV format
- Export to CRM or marketing automation platform
Search results, saved lists, and SmartLists, or individually selected companies/contacts can be downloaded to a CSV or Excel file format.
If your subscription includes integration with a CRM or marketing automation platform, you can also send data to these systems.
How to Download as a CSV or Excel File
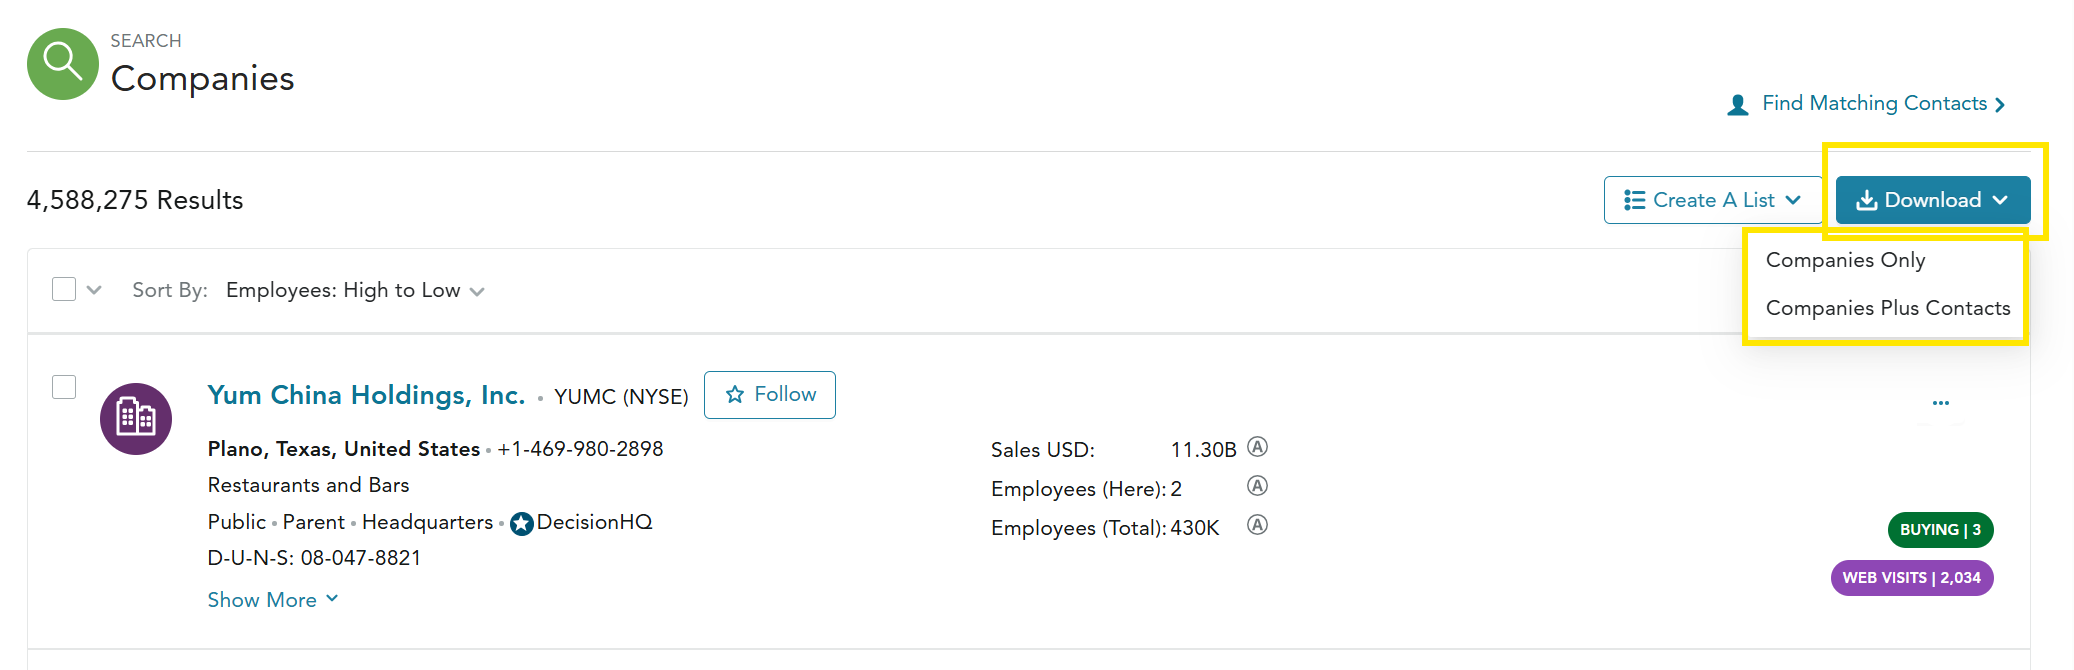
- Generate search results or open a saved list/SmartList.
- Click the Download button. If you are downloading a company list, you will have the option of downloading Companies Only or Companies Plus Contacts.
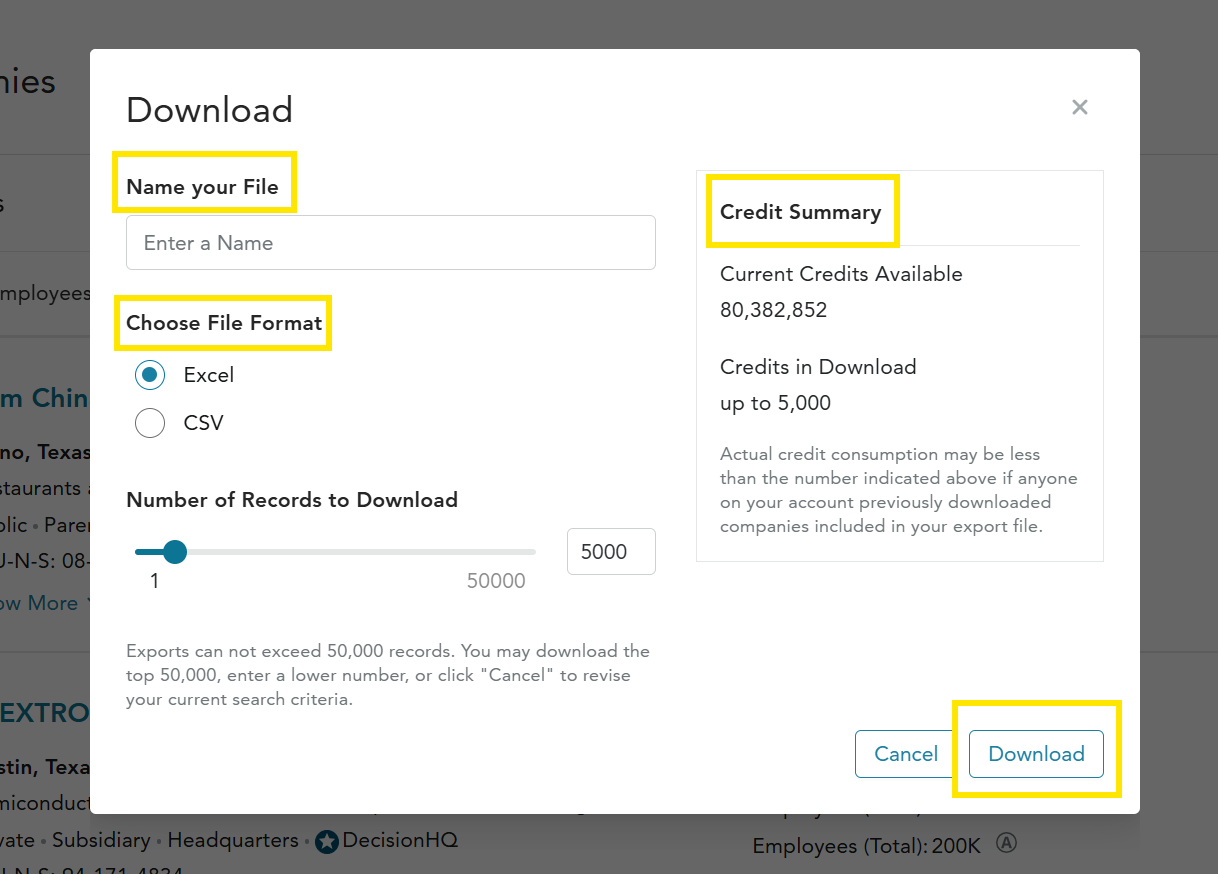
- Follow the prompts on the download screen to choose the file format and name the file.
- Determine the number of records to include in your download by entering a number in the box or dragging the slider. Exports cannot exceed 50,000 records at a time. As long as your list is less than 50,000 records and you have enough credits available, the number of items in your list will load in the Number of Records to Download box.
- If you are only downloading companies, you will click Submit to initiate the download.
- If you opted to download companies plus contacts, click Next.
- Designate how many contacts per company to include in the downloaded file. You can include up to a maximum of 10 contacts per company. The tool will default to 3 contacts per company.
- Select the types of contacts you want to include by checking the boxes next to the desired Contact Level and Job Function. You can select one or more checkboxes in each Contact Type category. If you do not make any selections, all contacts will be included in the file.
- Check the box next to Yes, include emails/direct dials if you wish to include this information in your file.
- Click Download to kick off the file generation process. Depending on the size of your list, the process may take a few minutes.
- Once generated, your downloaded file can be accessed from the downloads folder on your computer.
Companies Plus Contacts Options
Choose Number of Contacts
Enter the number of contacts to include per company.
Contact Type
Select the Contact Levels and Job Functions you want to include.
Sort Options
Click to change the sort order. Sort by Contact Level, Direct Phone Available, Contact Name, or Email Available. Sort order will set the priority for which contacts to include.
Include Emails/Direct Dials
Click here to include emails and/or direct dials when available.
How to Export Records to CRM or MAP
If your subscription includes access to D&B Hoovers in your CRM or a Marketing Automation Platform connector (MAP), you can easily send companies and contacts from D&B Hoovers to your CRM or MAP from search results, saved lists and SmartLists, or Company and Contact Profiles.
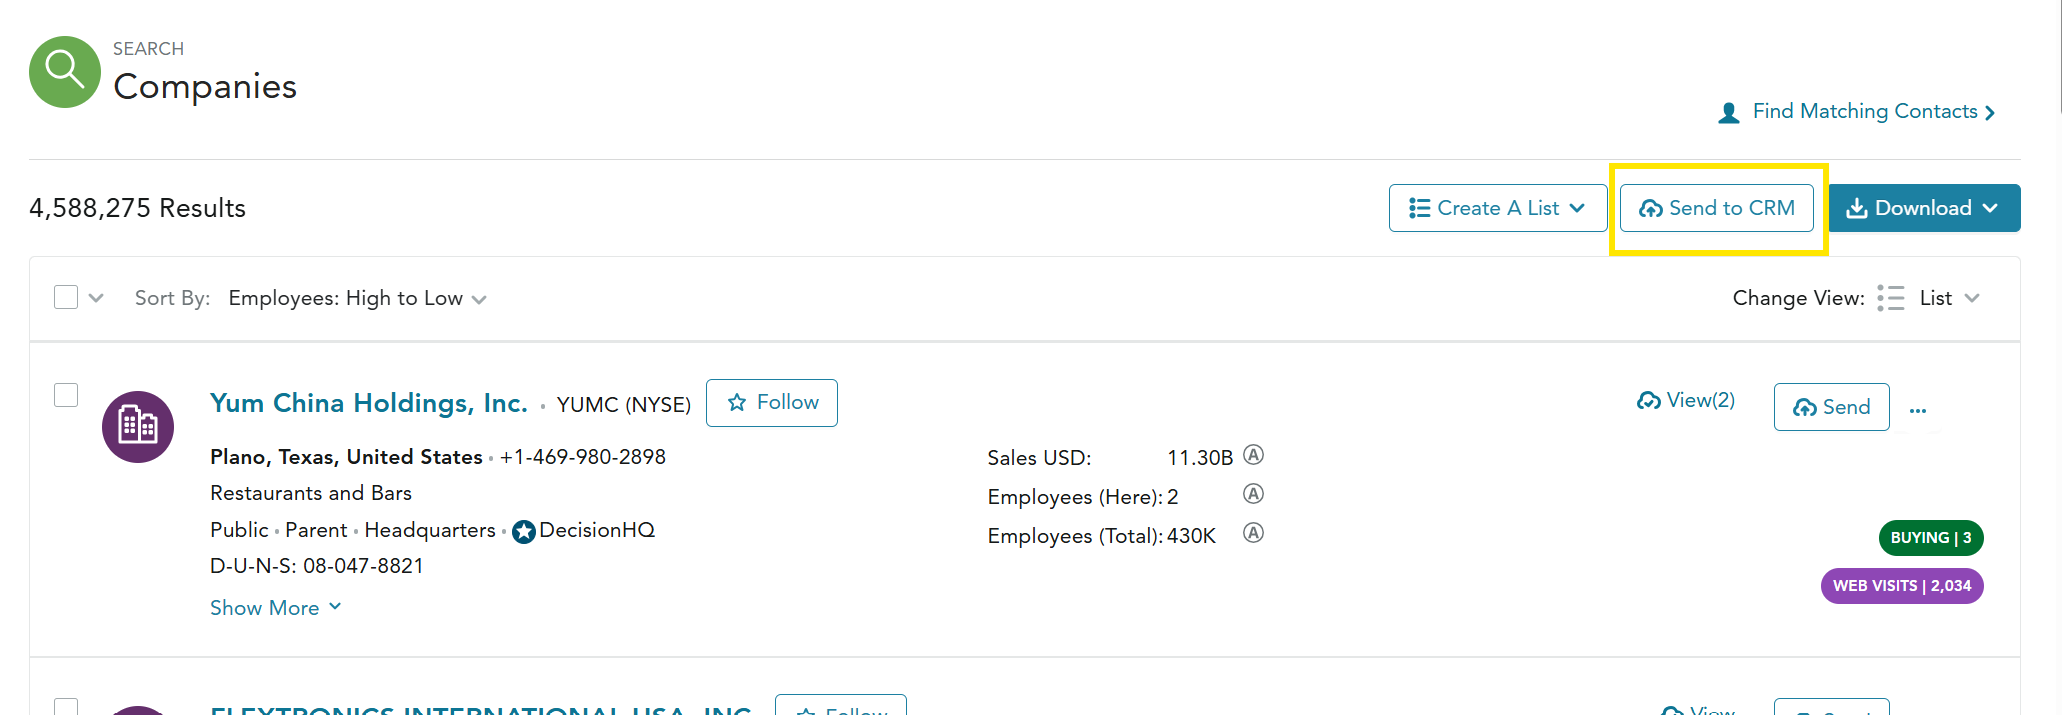
- Generate search results or open a saved list/SmartList.
- Click the Send to CRM button or Send to MAP button as appropriate.
- A dialogue box will open. First, choose if you want to send these records as accounts or leads. If you choose leads, you can opt to include a contact with a company record by choosing an Executive Function from the provided drop down list. For both accounts and leads, you will be asked to designate the Account or Lead Owner.
- To avoid duplication, D&B Hoovers will exclude records that are already in the CRM. The checkbox at the bottom of the dialogue box tells you how many records will be excluded from your send. Uncheck this box if you want to include the duplicate records.
- Click Continue to proceed with the send.
Tips & Tricks for Exporting
Select Individual Records
If you only want to select a few records for export, you can click the check mark symbol next to an item to select it.
Send to CRM from Company Profile
Leverage the blue Actions button at the top of a Company Profile to send a company to your CRM.
How to Upload a List
You can upload your own list of companies to access D&B Hoovers data for those organizations. This is a great way to work with your assigned accounts in D&B Hoovers. Simply upload a CSV file and we will create a new list of matched companies from D&B Hoovers.
File Requirements
You can choose between two options for the file upload.
- Option A: The file must include the D&B D-U-N-S® Number for each company. With this option you can upload up to 10,000 records at a time. The maximum allowed file size is 10MB.
- Option B: The file must include the following information: 1) Company Name, City, and Country/Region; or 2) Key ID; or 3) UK Registration Number. The file can contain up to 1,000 records with a maximum file size of 10 MB.
- Column headers are not required in the CSV file, as the upload wizard allows users to select the column name during the import process.
- If your list exceeds the size limits, break it up into separate lists and then combine the lists after upload with the Add to List button on each list page.
Upload Your List
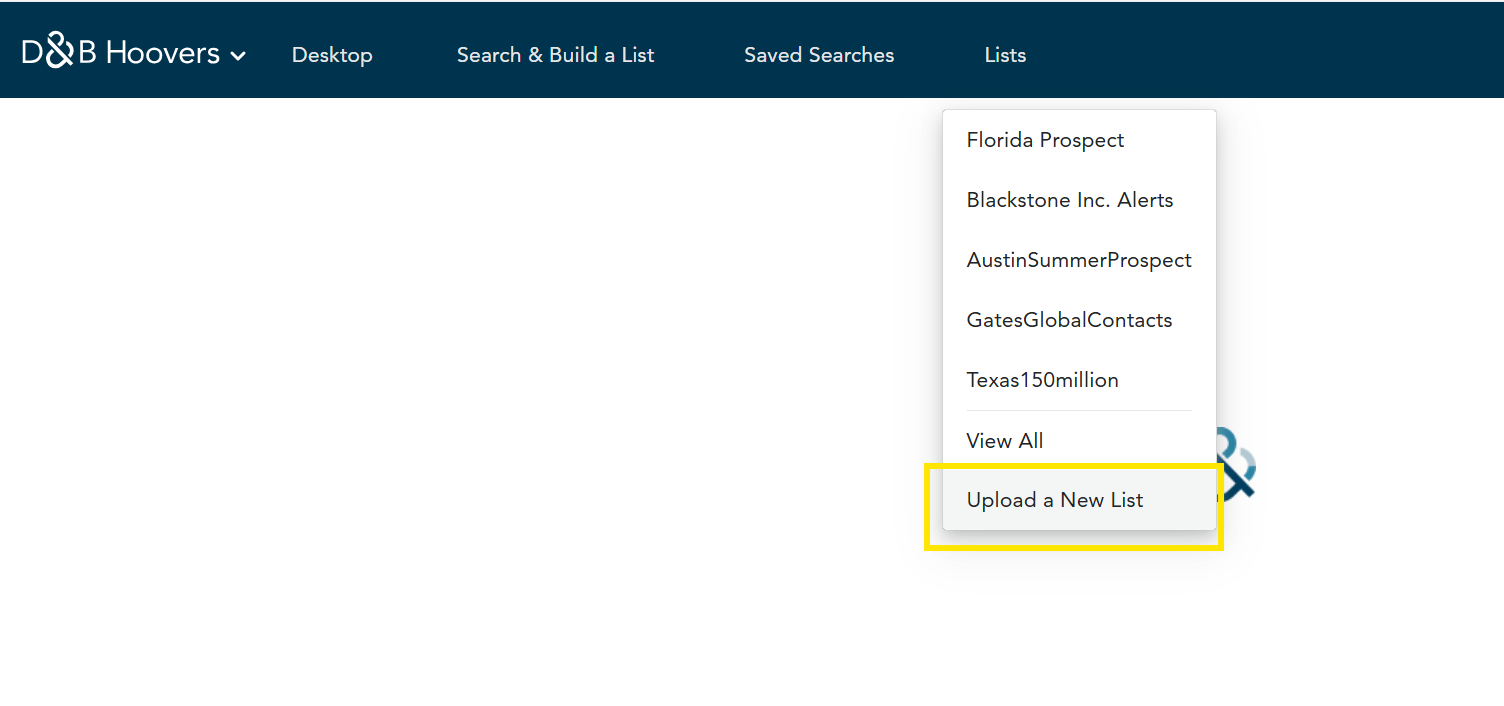
- Select Upload a New List from the Lists Menu.
- Select the type of list you will upload (Company or Contact) and click Next.
- For a Company list, select the best option based on the contents of your file. D-U-N-S Number matching is more efficient for our system and can support a larger uploaded list.
- Drag and drop a file into the browser window or choose a file on your computer to upload. Then click Upload List.
- Map your columns using the sample rows of data from the file as a guide. Click Next to continue.
- The import tool will match companies based on the data in your file, and then you will be prompted to enter a name for your list in the “Name Your List” field.
- Review the results. Once the file finishes processing, the number of matched companies is displayed, along with those companies that did not match to the D&B Hoovers company database. Click on the list name within the results modal to navigate to the list.
- View your list and begin interacting with these companies in D&B Hoovers.
Lists Page
Access all saved lists and SmartLists by clicking Lists on the navigation bar. The five most recently accessed lists will display on the drop-down menu. Click View All to open the Lists Page.
Find Lists
Enter keywords from a list name to quickly locate a list.
Working With Lists
When you Hover over a list name, a series of icons appear on the right side of the screen. Options include renaming, sharing, deleting, or pinning to your desktop.
You can also click Notes to add notes about your list.